Most aquascapers begin by purchasing their first aquatic plants.
However, this can get expensive over time and can sometimes lead to unavoidable plant deaths.
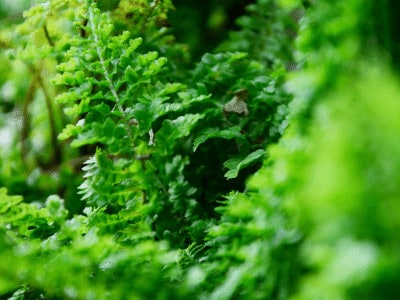
One of the best parts of underwater plants is learning how to reproduce them at home.
What Is Propagation?
Propagation is the process of making new plants from existing plants.
Scientifically, the term propagation includes two types of plant reproduction – sexual propagation and asexual propagation.
Plants that reproduce by sexual propagation require pollen to fertilize an egg.
Asexual propagation, on the other hand, occurs when a piece of a parent plant regenerates itself into a separate plant.
Both types of propagation can occur naturally in the wild. This article focuses on intentional asexual propagation in aquatic plants.
Methods of Asexual Propagation
Home propagation of aquatic plants typically occurs via one of the following methods.
Cuttings
Propagation from cuttings is a straightforward way of producing new plants from existing plants.
As you could probably guess, cuttings are cut-off pieces of the parent plant. These can then be replanted to grow a separate plant.
You should take cuttings using a sharp knife or scissors and sterilize them using alcohol or flame.
Dirty tools can transmit fungus, bacteria, and disease from one plant to another, so using a clean-cutting instrument is critical.
The size of the cutting and the site of the cut varies from one plant to the next. Remember to do a bit of research before you snip.
Some plants regrow from stem, leaf, or root cuttings, depending on the individual plant.
You can insert aquatic stem cuttings back into the same substrate as the parent plant.
Over a period of a couple of weeks, the cutting develops roots and produces new growth.
The parent plant also experiences increased growth after cuttings. The cutting process stimulates the parent plant to produce new growth at the cut site.
In many plants, this usually produces two new stems at that node.
More energy is also directed to the center of the plant, stimulating more vigorous growth throughout.
Layering
Layering of plants occurs when a section of the plant above ground makes contact with the soil or other medium.
The plant then sends out new roots from this point of contact. This happens naturally in many vining or creeping plants, but you can do it manually as well.
In aquascaping, some plants that reproduce by layering send out “runners,” from which new plants spring up.
To encourage plants to send out runners, you can trim the portion of the plant that is above the ground.
This will stimulate the plant to push its growth toward its roots, eventually producing a new plant from the runner.
For vining plants that can produce by layering, you can simply push a section of the plant back into the soil or sand. The plant will grow new roots from there.
Depending on the plant, this can occur at the middle of the segment or the tips.
Once the section develops new roots, it can either be left to continue growing or separated from its parent and replanted.
Division
You can propagate plants that grow in root clumps and plants that have rhizomes by division.
To propagate a new plant by division, you first have to unearth the parent plant’s roots.
Then, being careful not to damage any more roots than necessary, tease apart the parent plant into two or more separate plants.
Once separated, you can then replant the parent plant and newly propagated plants.
Planting them close together will result in a fuller, denser grouping of plants.
You can also plant them separately to create another cluster of the same plant elsewhere in the aquarium or in a different tank altogether.
Common Aquascaping Plants and How They Propagate
The following common aquatic plants and their propagation descriptions illustrate how you can propagate different aquatic plants at home.
Ludwigia Peruensis
Ludwigia Peruensis is an easy aquatic plant to care for, even for beginners.
Plus, it looks stunning in any aquarium.
The upper leaves are typically dark green, and the undersides are a vibrant red.
Key Care Points
- Maximum Size: 40 – 55 cm (15.75 – 21.65 inches)
- Recommended Temperature: 22 – 28°C (71.6-82.4°F)
- Substrate: Fine Gravel
- Placement: Midground
- Lighting: Bright
Propagation
Ludwigia is primarily propagated from stem cuttings.
Using sharp scissors, cut a stem segment and remove two paired sets of leaves from the cut end.
Insert the cut end of the stem into the substrate, and the cutting should take root within a few weeks.
If allowed to grow tall enough to reach out of the water, Ludwigia can flower and produce seeds if pollinated.
However, this is a much more complicated method of propagating Ludwigia, and propagation from stem cuttings is much more common.
Dwarf Hairgrass
Dwarf Hairgrass is a carpeting aquarium plant that blankets the bottom of your tank.

While easy enough to keep alive, this plant requires a moderate amount of tending to thrive.
Key Care Points
- Maximum Size: 7 – 12 cm (3 – 5 inches)
- Recommended Temperature: 10 – 20°C (50 – 83°F)
- Substrate: Coarse Sand
- Placement: Foreground to Midground
Propagation
Dwarf Hairgrass naturally propagates via layering by sending out runners through the substrate.
Runners are extended roots that plants like Dwarf Hairgrass use to spread out like a carpet.
You can sometimes see these runners through the tank glass. Once a plantlet begins to develop, you can cut the runner and transplant the plantlet.
If you have an existing clump of Hairgrass, you can also propagate it via division. Begin with a freshly purchased or uprooted patch of Hairgrass.
From there, you can separate the cluster into smaller chunks comprised of five to ten blades of grass.
Plant these into the substrate with an inch or two of space between them. Trim a couple of days later to encourage horizontal growth.
If you find that a plant like Dwarf Hairgrass isn’t sending out runners as quickly as you would like, you can stimulate runner production by trimming the top of the grass.
Turning up the brightness of the lights in the aquarium can also encourage faster propagation.
Java Moss
Java Moss is an effortless aquatic moss that is hardy and versatile for beginners and experienced aquascapers alike.

Key Care Points
- Maximum Size: 10 cm (4 inches)
- Recommended Temperature: 15 – 30°C (59 – 86°F)
- Substrate: Optional
- Placement: Floating; Attached to hardscape
Propagation
Java Moss is insanely easy to propagate. Its propagation method is most similar to division, although it appears nothing short of magical.
You can propagate Java Moss and most other mosses by snipping off a moss piece.
Simply attach it to something or allow it to float. If left floating, it will rapidly grow into a raft of moss.
It will also spread like wildfire over any surface you attach it to.
You can build walls and other forms out of Java Moss by securing pieces of moss between organic mesh pieces in the desired shape.
Some aquascapers are known to craft magnificent structures out of mosses like this one.
Java Fern
The Java Fern is a hardy, beginner-friendly plant that can thrive in both fresh and brackish water.
It’s also compatible with a variety of aquarium fish, which makes it popular among fishkeepers and aquascapers alike.
Key Care Points
- Maximum Size: 15 – 35 cm (6 – 13 inches)
- Recommended Temperature: 20 – 28°C (68 – 82°F)
- Substrate: Optional
- Placement: Midground to Background
Also read: How To Plant Java Fern In An Aquarium
Propagation
There are two methods of propagating Java Ferns, both of which fall under the category of division.
First, clusters of Java Fern rhizomes can be separated and replanted close together or in a new location. This is a common method of manual propagation for Java Ferns.
Java Ferns can also propagate themselves through a process called apomixis.
Once mature, a Java Fern begins to produce clones, called plantlets, under its leaves.
These plantlets eventually develop roots and leaves. They will break off from the mature plant, and you can plant them elsewhere.
Hornwort
Hornwort is hardy and easy to keep and cultivate, making it a popular aquatic plant for beginners.

Its hairlike leaves make it look like a furry, green tail floating in the water.
Key Care Points
- Maximum Size: up to 10 feet in the wild
- Recommended Temperature: 15 – 30°C (59 – 86°F)
- Substrate: optional; fine sand or mud
- Placement: Floating; Background
Propagation
Most aquarists find that Hornwort readily propagates itself without much intervention on their part.
Like other stem plants, Hornwort side shoots eventually detach on their own.
These shoots either float or plant themselves in the bottom of the tank.
If you want to propagate them manually, all you have to do is trim some existing Hornwort plants.
Stick the cuttings into the substrate. Hornwort cuttings root quickly and begin to show new growth within a couple of weeks.
Other articles you may also like: